Mountain Bike Skills: Early Apex in Messy Corners

Hey Everybody! I know I won’t win any design awards for this “video,” but it’s still very useful information. Check it out! Bad line choice combined with too much speed and momentum get a lot of riders in trouble when the trail is loose and rough. Sound familiar? Here’s a simple technique that will help you find the good line in tough corners and switchbacks. And, on net, be faster (and safer) than riding like a knucklehead. CLICK HERE FOR VIDEO

Mountain bike climbing position. Video


This video deals with the adjustments in body position and weight placement that a rider will need to make on those really steep, loose, nasty sections of climbs. (Also, check out a couple more articles that relate to those nasty climbs and proper body position on the bike.)

**** CLICK HERE FOR VIDEO ****

Climbing on easy trail is easy. When the  going gets tough — steep, loose, rocky, rooty — is when we have to make the proper–and often counterintuitive– adjustments to our riding position if we want to taste success at the top.
IMG_0203IMG_0205

Of course success may mean simply making to the top while still on the bike. But, and especially for more advanced riders, success means that if things are done correctly–maybe even slightly better than in the past–the rider will save percentages of energy on every climb and still get to the top slightly faster than they have previously.

Of course, this all adds up as the rider progresses through a ride or race.

As always, a couple minutes of video can not replace real MTB coaching. Sign-up for camp and get the real thing!


Solutions and Momentum Paths – Good Line Choice in Mountain Biking

There are three cool videos below that relate to good line choices in mountain biking.

But, first, a little something on the subject:

Reading the trail or track properly is arguably the most important aspect of riding a mountain bike fast and/or safely. This blog post focuses more on the Going Fast aspect of riding and racing and will appeal more to the higher level riders (where every little bit counts), but the newbies are still encouraged to follow along.

There’s a saying in racing, “The top riders are looking at a totally different track than everybody else.” Of course, it’s the same track, the best riders are just seeing it differently than the others. The best riders are seeing solutions while most riders are trying to avoid obstacles. . . again, same track. The best riders are seeing smooth and fast momentum paths and are then trying to find ways to maintain those momentum paths on the trail or track’s surface, while most riders are simply trying to ride the lines on the trail, and usually the main line (the People’s Line, as I like to jokingly call it) as fast as possible.

Unfortunately, the main lines on a trail are formed by the majority of riders. And, the majority of riders are doing what I call micro-managing the trail: simply dealing with what is directly in front of them . . . then what’s directly in front of them after that . . . then what’s directly in front of them after that . . . with no regard for where they need to be further down the trail. Therefore, the main lines are formed by and become an act of avoiding obstacles. Putting out fires. Damage control. When trail gets a bit gnarly, and gnarly obstacles appear, most riders are just in survival mode and trying to miss the big stuff.

Sound familiar?

Not a good way to ride the bike.

What we want to do is “macro-manage” the trail; treat our next line of sight as one piece of trail, set-up properly for obstacles, corners, etc. See our end-points and work off of smooth momentum paths that allow us to carry speed and reach the end of our line of sight in the least amount of time possible. See our solutions or blueprints, and then come back and work out the details and solutions through, around, or over obstacles in regards to where we need to end up. Often, this means doing the work early in order to get the payback further down the trail . . . but, you’ll never know where and when to do the work unless you’re able to look down the trail in the first place. (Of course, this does involve having a handle on other riding techniques which we cover thoroughly in camps.)

But, how do we do this? How do we know what to look for? How do we look ahead and find these momentum paths and solutions and and all the other crap I was talking about and still deal with all the danger that is right in front of our front tire and trying to kill us?

Well, that’s the type of thing that we cover extensively in camps and coaching sessions. We go waaaay deep down that Rabbit Hole. We look at how to properly read the trail in every situation that we encounter no matter what area of riding we may be focusing on. There is a segment in my coaching where we spend a couple hours focusing exclusively on the techniques of reading the trail or track.

Very, very few riders do this correctly.

Again, for beginners, you have to read the trail properly if you want to ride safely and feel comfort and control on a mountain bike. More advanced riders: you have to read the trail properly if you want to ride Actually-Fast (That means actually fast – not just faster than your slower friends).

Every Actually-Good rider knows that trail-vision is huge. There’s no way I’m going to attempt to cover the vision aspect of mountain bike riding via internet. Sign-up for a camp or coaching session and we’ll put in some quality time and I guarantee you’ll be blown away at the difference between doing this OK and doing it correctly.

In the meantime, check out the videos below of top riders doing it right.

 Video 1: Thanks to Nate Hills and his Follow Cam Friday for this one. The first rider (Ted Morton, the rider the camera is following) in this video takes a bunch of interesting and fast lines. He’s clearly seeing way down the trail and locating his end points, knowing where he needs to end up, and doing the work early in order to get there in the least amount of time possible. He also uses roots, rocks, etc. to bump-jump (we cover this technique in camps) many obstacles, set-up for further down the trail, and to get backsides and good pumps off of all kinds of stuff.

Video 2: This video comes from Vital MTB, great site. Skip to about 3:45 of this vid and watch these top riders rip this corner in the Aspen round of the EWS (Enduro World Series, the best professional enduro racers in the world). Everyone goes to the outside; some do it better than others, some set it up a little better, etc. . .but the last guy, in the last clip, Sam Hill – the winner of the race – goes to the inside in this corner. No one else took the inside line. No doubt, Hill was thinking in terms momentum paths and time and not simply following the main line as fast as possible. The main line – the outside line that everyone but Hill took – did have a little banking to hold the riders in the turn. At one point – earlier in the weekend –  it probably was a smoother arc through the corner than the tight inside line, and probably faster. However, as the race wore on and more and more riders used the outside, the line got pushed out at the apex and “hooked.” Really, at this point of the race, the outside line is actually a sharper turn than going inside – riders are actually going back left and then turning right! Hill notices this and adapts, taking the sketchy, loose, inside line that is now actually better than the now blown-out main line. Hill is known for finding these sneaky lines that no one else sees. He’s definitely one of the best at reading a track. He’s also a two time Downhill World Champion (three time?) and now one of the top dudes in enduro racing.

Video 3: Another video from Vital MTB. People are talking about this Downhill race run as possibly the best of all time (I’m still going with Danny Hart’s 2011 World Champs run, but whatever . . . C’mon! It’s World Champs! The huge whip at the end?!? C’mon!!!). Anyway . . . Because of the rain, the track is about twenty seconds slower than it was when dry in qualifying. In Gwinn’s race run, right off the bat the announcers are talking about his inside line choices and that he’s taking the “shortest way down the track.” Clearly, he’s adapting and thinking in terms of momentum paths and time – not simply trying to go as fast as possible down the main line. The track is obviously slower than it was when it was dry, so the line choices should change, right? It can definitely be argued that Gwinn won this race in the mental department by thinking outside the box, adapting . . . and reading the track better than the other riders.

Again, this blog post probably appealed to the more advanced riders. But these same concepts apply at the beginner levels of riding. Too often micro-managing the trail gets beginners into big trouble and gets them hurt. For beginners, properly reading the trail is much more about controlling momentum and safety, as well as building good habits in order to improve. I keep camps small so I can cater sessions to each riders needs and ability levels. Sign-up for a camp!!!


Technique of the Week: Fenders

I guess this could be more of a “Tip of the Week” instead of Technique. But, still good stuff.

For some reason, I’ve never run fenders on my bikes. . . until now!

They looked a little goofy; I didn’t think I really needed one; and, honestly, I really didn’t think that that little piece of plastic was going to help much in keeping gunk outta my grill.

Way back in the day — just like everybody else, at that time — I did occasionally hack a Gatorade bottle in half and zip-tie it to the downtube at muddy downhill races. But, as far as the recent incarnations of fenders — those small, plastic little suckers; almost imperceptible on the bike; adhered to the fork brace/arch —  I’ve never messed around with them until recently.

It took about 50 feet into the trail, on a pretty wet day, and I was blown away at how well that little fender actually works.

The usual face splattering, muddy glasses, and the palatable taste of gritty dirt was pretty much nonexistent on that ride.

And, I’m sold on fenders!

It’s probably pretty easy to understand why a rider would go with a fender — especially if it works well — when it’s wet. But, I’ve also been loving the fender in dry conditions.

There have been countless times that I’ve had to pull to the side of the trail in order to dig a small rock or other type of trail debris out of my eyeball, even in the dry. Rocks coming off the front tire can have some pretty incredible velocity (the good ones will easily chip the paint of a frame). I’ve had plenty of rocks come off the front tire, rattle around in between my glasses and face for a bit, until finally finding a home in my eye. It sucks when that happens.

I’ve also — again, on quite a few occasions — had a rock come off the tire and hit me hard enough in a tooth that I had to give the ol’ tougue-swipe to make sure the tooth was still there.

Teeth aren’t cheap. Fenders are (only a few bucks).

And, to a small degree, the fender will protect your frame a bit.

Cheap, easy to put on the bike, and a remedy to the above annoyances. Pretty sure I’ll be rocking a fender from here on out on all of my bikes.

Definitely give a fender a try if you’ll be riding in conditions that will be even a little bit wet. And, I highly suggest leaving it on in the dry if the trail conditions are at all loose, providing sections the risk of catching flying debris of for the front tire.


The “Glass of Water” MTB Technique

Check out this video featuring many of today’s top professional Enduro and Downhill racers (and, yes, the following will apply to beginner, intermediate, etc., mtb riders):

Click on HERE for Video

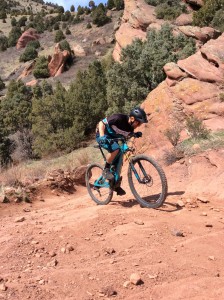
Notice this: when things are going correctly, all of these riders have virtually no movement in their heads. Of course, they are moving down the track, but the momentum path of the head is smooth; there are no abrupt or jarring motions. Even when the bike is bouncing, pivoting, and sliding wildly, the head is moving through space in a calm and predictable manner, a smooth momentum path.

Enter the Glass o’ H20

In my MTB camps, I have students imagine that they have a glass of water duct taped to the top of their helmets. If they are doing things correctly while descending, this glass of water should not spill, it shouldn’t slosh around, the surface of the h20 should be calm and smooth. (Of course we don’t take this exactly literally. But after watching the video, you probably get the point.) 

Keeping the head — or control center of the body — calm is essential to descending on a mountain bike well in tough terrain. This is true to all speed oriented sports (and, with very rare exception, all athletics); watch motocross and supercross racers in the rough stuff; watch downhill and mogul skiers…check out some slow motion footage of a cheetah chasing a gazelle through the Serengeti on National Geographic (Gazelle? Antelope? Whatever…the fast, scared thing with the horns).

In all of the above examples, the top athletes — and big cats — will have That Calm Glass of Water. There are many reasons why this is essential .

Really, the calm glass of water is a result of doing all the other things properly — or extremely close to properly — while descending on the bike: particularly, body position and especially weight placement/distribution.

Here’s Where Things Get Good!

I have never met a rider who has a complete understanding of descending position, or the “attack position,” on the bike (and almost no one understands what I like to call weight placement and/or line of force, two very essential elements of MTB technique when it comes to riding well). This includes world cup downhillers and pro enduro racers. Often, top riders are doing many things correctly or very close (you don’t ride that well without doing most things very well). But, because they are unaware of what these things actually are, it is very easy for riders — even at these levels — to develop bad habits, to train ineffectively, to communicate improper techniques to others, as well as not being able to replicate what they were doing properly, when they were on there game, once they inevitably fall of that game a bit. (Often, that’s when they come to me!)

In other words, they would stand a way better chance of staying fast and going faster if they knew what they really needed to work on. Following this logic, even in the areas where they are pretty good, even these top riders could certainly improve.

For less experienced riders, knowing what’s up with riding means being able to ride more difficult trails, keeping up with your buddies, developing control and confidence, being more efficient.  These equate to being safer and faster, things we all want and need!

The Nuts and Bolts

The body is a kinetic chain. This couldn’t be more true when it comes to keeping the head balanced and stable while riding the bike (the Imaginary Glass of Water). If one area is off, that will permeate and reflect poorly in other areas. Often, this isn’t apparent in areas that are adjacent to one one another or local to where the problem becomes noticeable.

Example: I’ve worked with numerous riders that have complained of riding “tight” or “stiff.” The typical rider who is aware of this issue is usually fairly experienced. They know this is a problem not only because they are a student of the game, but because they’ve ridden way better in the past. When they were riding better, they were smooth and flowing instead instead of bouncing around (and spilling that glass of water!) and holding on for dear life .

This issue of being too stiff or rigid usually becomes noticeable in the head. The rider is bounced and jarred off balance and off line on the trail. Vision is difficult in the rough sections because of the jarring of the head (I call this “eye-ball jiggle” where it seems as if your eye-balls are going to jiggle out of your skull because of the successive and harsh impacts). Balance is way off because of the jarring of the vestibular system in the inner ear and lack of properly functioning vision resulting in the inability to define space (which essential for balance). The rider is pretty much out of control, simply trying not to crash, and doing damage-control rather than being proactive and looking to gain time on the trail or track. And, because the rider is fighting all of this, they become fatigued very quickly.

You do see the above mistakes in the video, especially on harsher than expected landings off of big drops (“head-slaps”) and when the rider gets the weight too far forward under braking, particularly in choppy braking bumps. Even though these are the top riders in the world, they still make mistakes.

When a rider develops this problem of unwanted head-jarring, they often simply try to keep their head still; they try to stay loose in their arms and upper body in order to absorb shock. Very often, they think they simply need to get into the gym and get stronger (This is soooooo common. And while strength can definitely be an asset, it alone will never remedy this particular problem caused by bad technique).

Enter the Feet

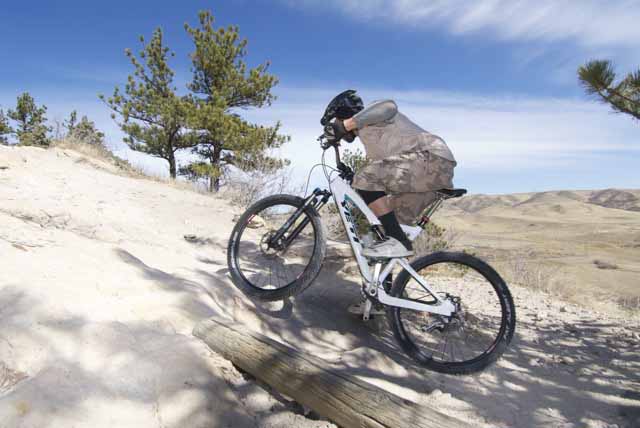
This problem almost always originates in the feet. Keeping the weight on the feet and keeping the line of force going through the bottom bracket (largely a function of weight placement and distribution) are huge in keeping the head still and that glass of water calm.

Example: Something as simple as dropping the rear heel more will initially place the weight of the rider slightly rearward and rotate the cranks slightly backwards. Initially, this isn’t good, however, as the bike impacts rocks and obstacles on the trail, it will essentially slow down because of these impacts. At this point, the rider’s line of force can no longer be vertical but it must now be angled downward from rear to front and through the bottom bracket of the bike (an imaginary line from the rider’s center of mass through the BB) in order to compensate for the forces of deceleration and keep the weight supported by the legs (the strongest muscle groups, and the natural suspension of the body — optimal Human Movement 101). Subsequently, now the body is able to absorb the impacts with the legs and retain an athletic position in order to provide for the most effective control of the bike.

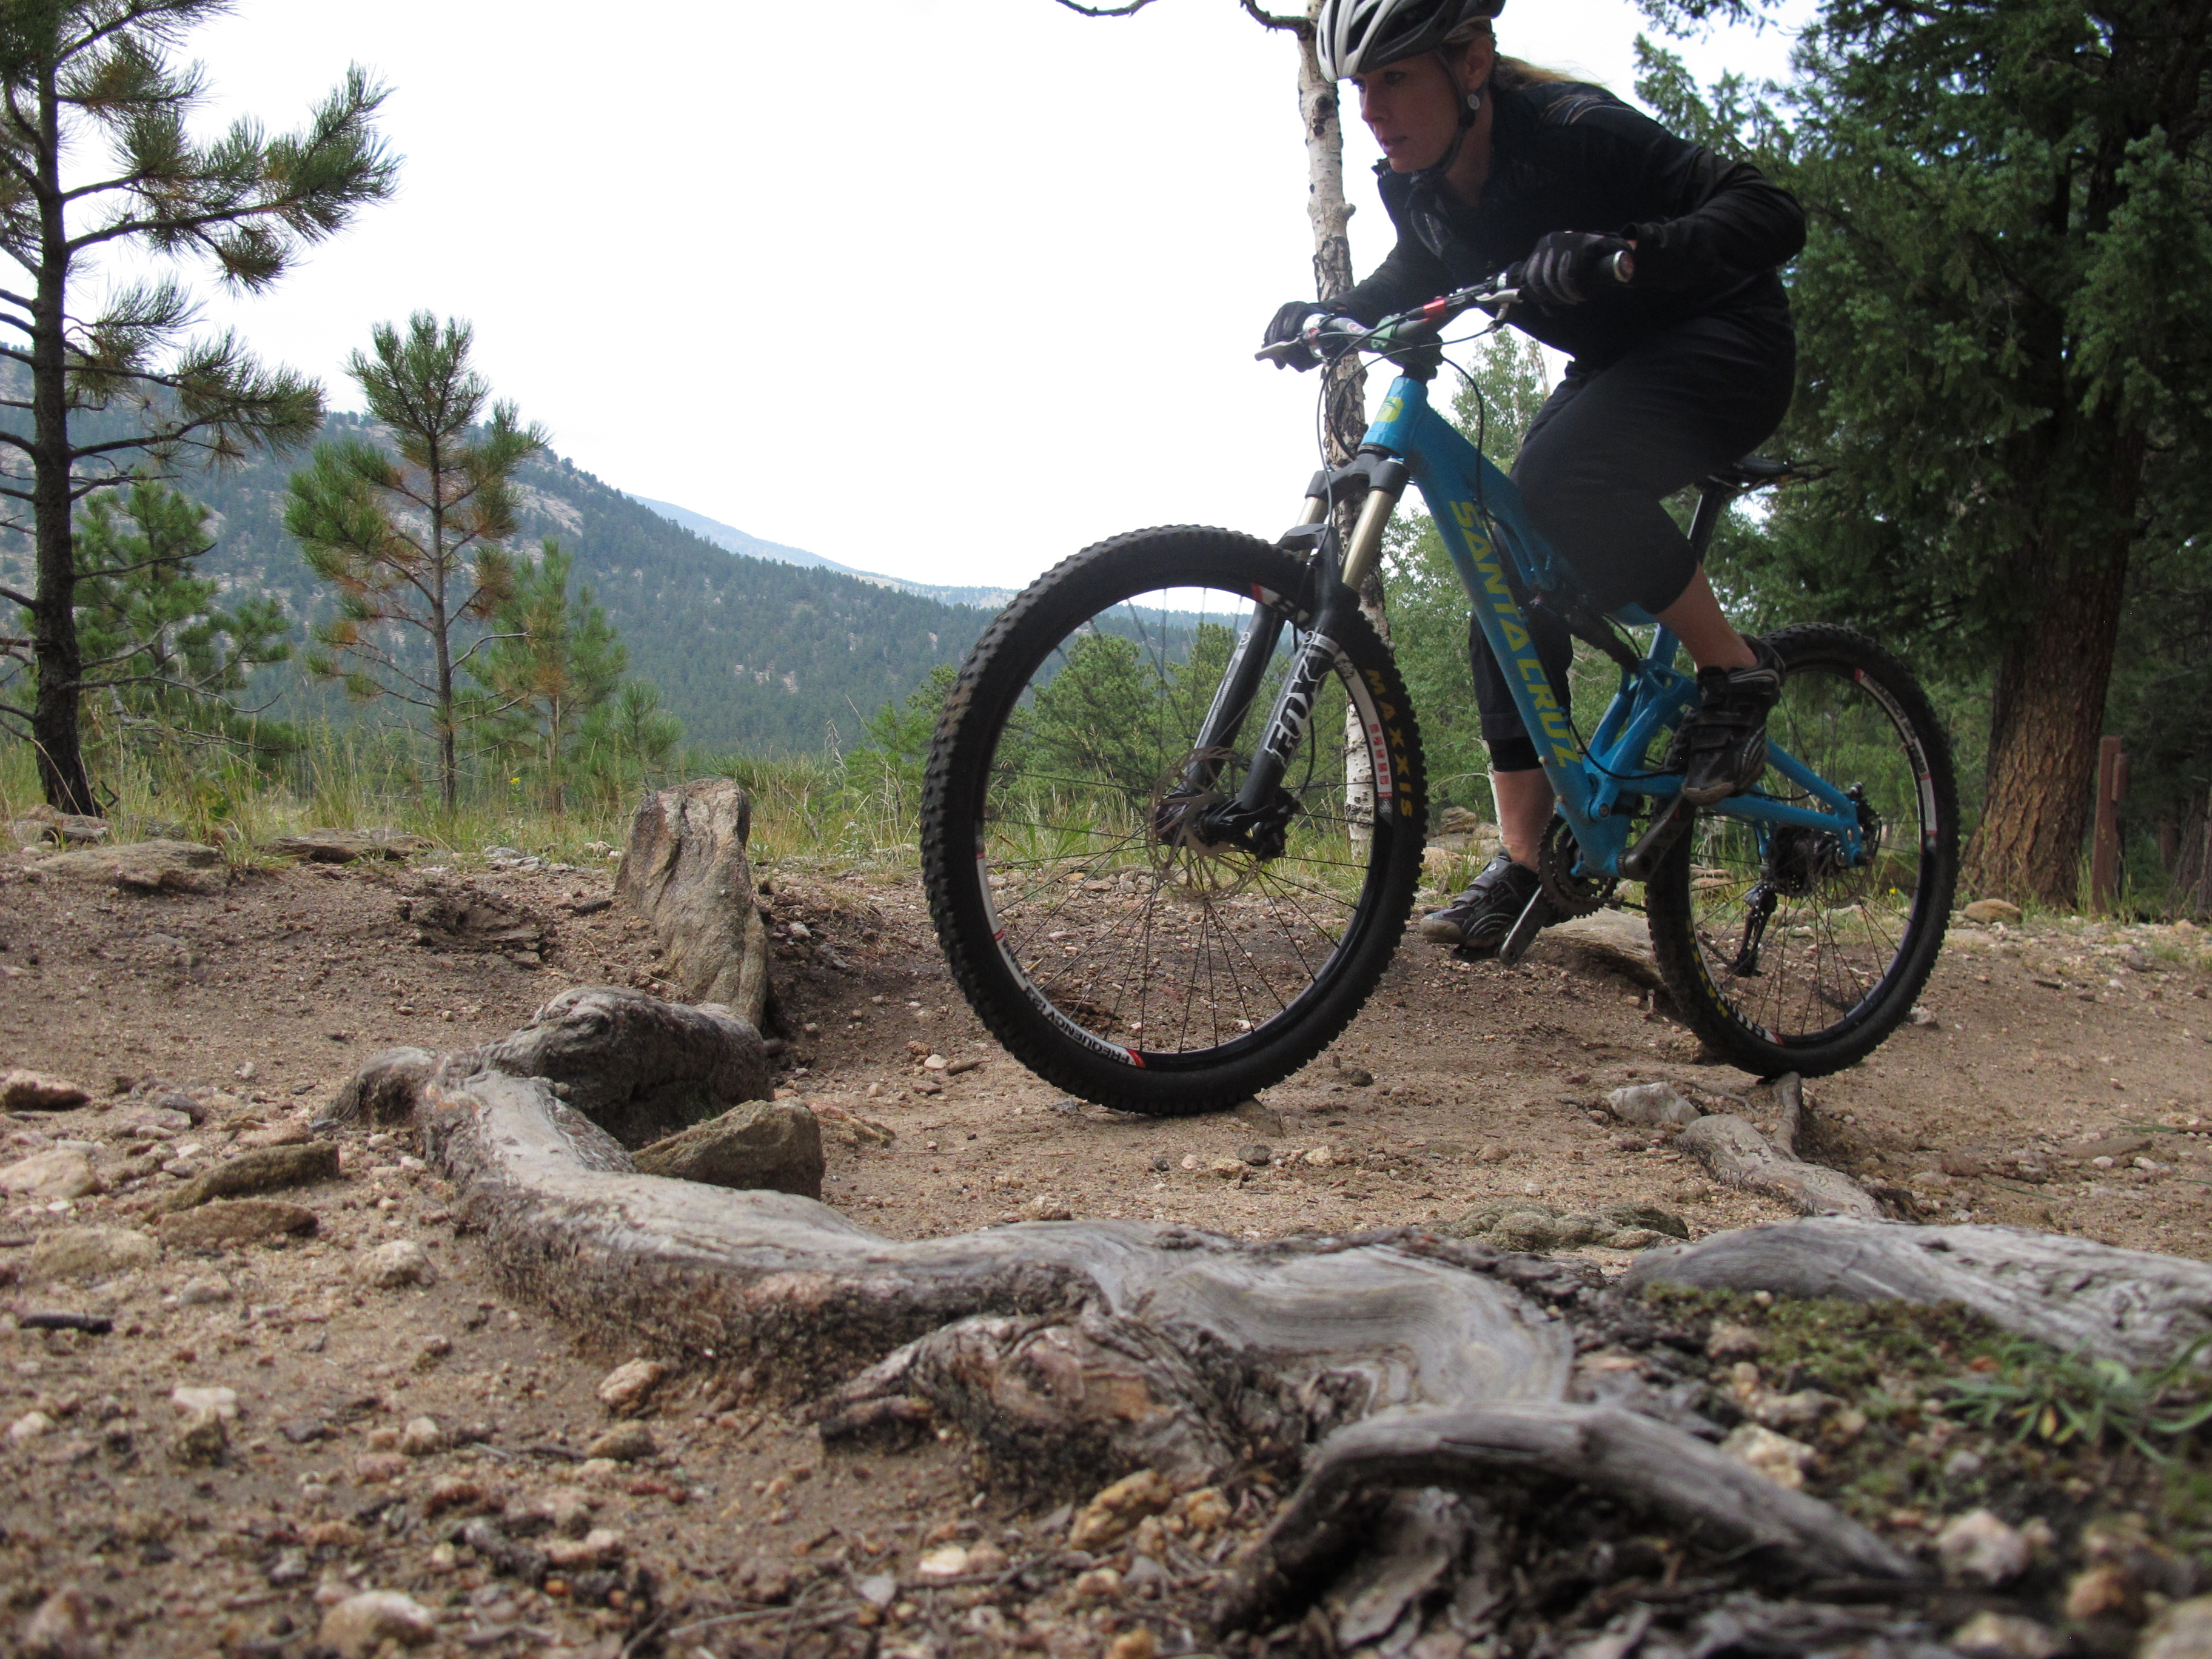
The properly angled line of force (through the bb) will enable the bike to pivot and move around the bottom bracket and “float” through the rough sections – the way the bike is designed to work (it won’t pivot and float optimally over obstacles if the rider’s weight, or line of force, is either in front or behind the bb).

The above also results in keeping the rider’s weight off of the arms* and allows the arms to remain loose and supply while the core remains a stable and balanced platform.

All this because we dropped the rear heel a bit…

And bingo! This will aid tremendously in keep the head calm and stable. Drop the heel and it controls the head… Kinetic Chain.

There are, of course, other factors that will contribute to this — either positively or negatively — but the above is a nice big chunk of what really matters.

Symptoms to Cures

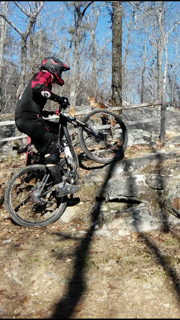
When a rider’s head is bouncing all over the place, I almost always immediately look to the rider’s rear heel and the angle of the cranks. The cranks will always want be to perpendicular to the riders line of force, and therefore, will be angled slightly rearward** when things are going good in the rough stuff . If the front foot is lower than the back foot and/or the rear heal is up, higher than the toe; that tells me that the rider’s weight is almost certainly in front of the bottom bracket, on the handlebars, arms, and front wheel. Now, the rider will be stiff and rigid in the arms, the bike won’t pivot and float optimally over obstacles further impeding it’s progress and robbing momentum… and that’s when that glass of water on the head goes bye-bye!

[In regards to the angle of the cranks: In the context of this article, the bike will be impacting obstacles and often the rider will be on the brakes, so deceleration forces of the bike need to be accounted for — the rear heel should be down, cranks should rotate slightly backwards, and the angle of the line of force should change from vertical to down from rear to front. If the bike is NOT DECELERATING AT A DIFFERENT RATE THAN THE RIDER — for instance on smooth or level trail, if the rider is off of the brakes, or perhaps if the rider is “pumping” an obstacle — then this rearward rotation of the cranks probably won’t apply.]

I really love this video. It shows pretty much all of the things that I coach being used at the highest level of the sport. It also disproves a lot of the bad technique that is being spread around as quality riding by all kinds of culprits. The “Glass of Water” is just one angle I plan on covering while using this vid as solid proof of solid technique.

Stay tuned, we’ll get back to this vid soon. I plan on getting a lot of milage out this puppy! Haha!

Check out the camp schedule here. Sign up! Bring a friend!


* Contrary to what you may hear in videos, from riding buddies, even from many pro riders — we can CAN NOT control the bike well if our weight is on our arms. I debunk this “weight the front wheel for control” myth immediately in camps.

** Unfortunately, many MTB coaches teach students to use the front foot as a “bracing foot” during braking. This results in the weight ending up on the front foot, in front of the bb, and, thus, the front of the bike (arms, bars, front wheel). This is not only terrible technique in terms of maintaining speed and momentum, but also quite dangerous.


MTB Chairlift Access Riding

Why should you clock some time with chairlift accessed MTB riding this summer?

Lot’s of reasons…

First, let me say that I’m just as guilty as anyone for not getting my butt up to the resorts these past couple years and getting some time in with good ol’ chairlift accessed downhill mountain bike riding.

Committing to making a living coaching MTB has, at best, severely limited my time at the races. This, combined with a borderline unhealthy addiction to motocross as my speed fix, has diminished my drive to get up to the hills and get on the lifts.

My excuses? Hey, I’m probably not going to get to race anyway, so who cares? And, I ride a ton of motocross these days, so my comfort level at speed, ability to process things at speed, and riding/control-fitness should be pretty dialed in when i need it on the MTB. Also, I ride trails a ton on my MTB; and, that, combined with the motocross should keep me sharp as a tack.

Right? Nope! Wrong…

Two awesome things that I RE-discoverred about lift access the other day:

It’s All About the Bike…

1) There’s no better way to dial in your ride for descending and/or control oriented technical riding than busting out huge amounts of vertical feet that only lift assisted riding can offer. Downhill bike, Trail-bike, XC bike…doesn’t matter…

After a whole day of riding and who-knows how many vertical feet of descending, I felt that finally — at the final run of the day — my new Yeti SB5.5 was about where I wanted it. I thought it was dialed coming into the day…

Wrong!…

Everything changed once I was able to get the bike up to speed and consistently ride there. No hikers. No riders coming up the trail in the other direction. Just endless terrain and gobs of time to play with settings. One after the other; tire pressures, sag adjustments, compression, rebound, bar height — and playing those off of one another — got tweaked and messed with until at the end of a long day, I was finally really close to where I wanted to be.

It would have taken weeks, if not months, if not ever, to get that amount of time, with that terrain, and with that consistency, to dial things in the way I was able to in one day.

It’s All About the Loose Nut Behind the Wheel…

Again, coming into my first Lift Day in quite sometime, I thought I felt pretty good on the bike. But I quickly discovered that though I had been riding a ton of MTB on normal trails, and riding lots of motocross, there’s no substitute for really riding mountain bikes fast if your goal is to ride mountain bikes fast.

First couple runs, I was waaaay off. I was sloppy. I was riding tight… At the end of the day?

Money!

I knew I was riding the best I have in probably in couple of years (since the last time I spent some decent time hitting the lifts).

And, again, there is no way I could have gotten that type of repetition, consistent speeds — while also on consistent and predictable terrain — from normal trail riding.

My comfort at higher speeds, ability to process, body position on bike, line choices… you name it, all jumped up a few notches by the end of the day. Huge gains in technical ability that just wouldn’t have happened without the stinkin’ chairlift…

Even ME? ChairLifts?… Yes, YOU!

Even if  you’re not into downhill, kinda freaked out about hairy terrain, whatever… I still can’t encourage you enough to give a day of lift access a shot.

Almost all resorts have very easy trails in addition to nastier ones. You can usually rent protective gear (I highly recommend a full-face helmet and knee protection at minimum — even if you are “taking in easy”). And, if you desire, you can usually rent bikes. Although any modern trail bike will be adequate for all but the real gnarly trails at resorts these days.

Obviously if you’re a gravity rider, lifts area no-brainer. But, even if you’re into XC, endurance… maybe just into having fun and being more competent and safe on the bike, there’s no better way to get the time and repetition to dial in your descending skills and techniques than lift access.

Get up there!


MTB Technical Climbing

MTB Technical Climbing. In the following, I will address proper climbing body position and its importance while ascending steep and technical climbs and also debunk a couple of infamous myths regarding climbing on your MTB.

While we can get away with sloppy technique on relatively easy climbs and still make it to the top, when things get steep and loose (when traction is at a minimum) and obstacles such as water bars, erosion ruts, baby-head sized rocks, and who-knows-what-else, begin to appear on the trail (these things almost always naturally appear more often when the trail gets steep—dirt doesn’t like to stick to steep inclines, so it erodes, exposing the obstacles), our technique needs to be nearly perfect to top the climbs. Simply pedaling harder – as we all know – won’t get it done! Also, proper technique will save you huge amounts of energy even on climbs that you currently may actually make, but maybe waste a bunch of energy in the process because of not-so-great technique.

Losing traction, “bogging out”, doing accidental wheelies, and/or getting a case of the “swirvies”, are all common causes of riders not making it to the top of technical ascents. My guess is you’ve experienced all of the above issues when trying to ascend steep terrain (I think we all have!). While other aspects of riding technique such as proper use of vision (extremely important); proper gear selection, or cadence (very often overlooked – even by “good” riders); and others, are essential in order to make it to the top, proper body position will do a ton to help alleviate the above “climb killers”.

Andy. Climb.PosDakRidge

Forward on the seat, chest down, weight over the bottom bracket of the bike…That’s good climbing position…


First, let’s talk about weight-shifts. Take a look at the photo. Notice how far forward I have scooted on my saddle. Is that comfortable? Nope! However, very rarely will you need to move this far forward for an extended period of time (Most saddle companies do make saddles built with things such as the “enhanced climbing nose” to make being in this position as comfy as possible. If it is too painful to move this far forward with your current saddle, look into a different one. Your grundal will thank you!).

Why move this far forward? A couple reasons: if your bike is set-up correctly for you on flat ground and you feel like you’re in a good position to comfortably and effectively apply power to the pedals, what happens when your front wheel is elevated perhaps a foot, like in the photo? Your hips (your center of mass and origination of balance and power) have now moved rearward in their relationship with your feet (your effective applications of power). Moving forward – shifting your weight forward – helps you maintain your “power position” as much as possible when the front of the bike becomes elevated, enabling you to continue to effectively apply power to the ground when things get steep. Another very important reason that I move this far forward on the saddle: I put more weight on the front of the bike. Accidental wheelies and cases of the “swervies” (when your front wheel begins to wonder uncontrollably all over the trail, making it impossible to hold your line) occur because there is too much weight on the rear of the bike (not enough on the front). Shifting your weight forward will help to prevent these things from happening.

Even slight movements, or shifts, of the hips make a huge difference in our ability to ride the bike (contributing massively to weight placement, balance, power delivery). I am almost constantly making weight shifts – moving my hips fore and aft – on the saddle when ascending. A gentle climb with a small grade? I move forward only slightly – maybe a quarter of an inch. Medium grade? Medium movement – perhaps an inch … Steep as heck? All the way forward – as far as possible.

Eventually, on super steep stuff, you will have to come out of the saddle. If you stay seated, your mass will simply be too far back in relation to the bike and the front end will have no weight on it, thus no control and a case of the swervies. In the clinics, I constantly refer to having our weight over the bottom bracket of the bike and riding the bike through the BB. Not only is this going to be the most stable and calm area of the bicycle (the bike will pivot around the BB by design), but, if we have our weight—or, our line of force, as I often refer to it—going through the BB, both wheels will be properly weighted: the front will be planted allowing for control and steering and the rear will be weighted properly for traction. This is the way the bike is designed to work. This is huge. Will it take a little more energy to get out of the saddle? Yep. But, you have no choice on the super steep sections of climbs.

Another massively overlooked part of proper body position on steep climbs is the position of your upper body. Get that chest down!!! Look at the photo above. My chest is literally only a few inches off of the stem, and, when the front wheel climbs up the rock that it is touching – elevating the front of the bike even more and pivoting it around the BB – my chest will almost be touching the stem (and I’ll come out of the saddle slightly—or more accurately, I’ll keep my weight on the BB, my core will stay stable and balanced traveling in a smooth momentum path up the trail, and the bike will pivot around the BB, pitching backwards and dropping the seat from under my rear). I CAN NOT allow my upper body to rise as the front of the bike rises, or – assuming I am in perfect balance before the angle of the bike changes – I will no longer be balanced on the bike (weight on BB), I will be falling off the back of the bike, and I will have to “hang” on the handlebars, effectively pulling back on them (because of gravity, my body wants to fall off the back of the bike). Of course, I still will need to pedal to maintain momentum, but, because I will be “hanging” off the back of the bike and pulling on the handle bars, the bike will want to move out from under my body (rear wheel still moving uphill because of pedaling, handlebars wanting to fall off the back of the bike with my body), and – Bam! I’m doing an accidental wheelie or the front of the bike becomes so light that it’s now swerving all over the trail. Either way, I have to cut my power, and that’s it – I’ve stalled out, “bogged down” – I’m done, and my climbing is over. I didn’t make it … that has happened to everyone.

Lon charging up a nasty section. His chest could be a little lower, however, his weight is on the BB and not on the seat (not seated). This allows the bike to pivot around the BB without pulling his weight too far back.

Lon charging up a nasty section. His chest could be a little lower, however, his weight is on the BB and not on the seat (not seated). This allows the bike to pivot around the BB without pulling his weight too far back.


Lowering the chest – drastically, in the case of a climb this steep – allows me to keep my upper body balanced on top of my lower body (and the BB of the bike). I don’t want to lean forward with weight on my handlebars, nor do I want to “hang” off the back off the bike. In fact, in theory, I should be able to “flutter” my fingers on the grips when I’m in balance on the climb. This ensures that my weight is balanced on my lower body and not leaning or hanging on my hands. (I also say that you should be balanced in a position that if the bike where to disappear, you whould land on your feet)

D excellent Climb Pos

Dee’s weight is over the BB of the bike, she’s actually off of the saddle a bit, and her chest is low. This allows for optimal weight placement and and keeps her weight balanced on the most stable part of the bike (the BB area) as the bike pivots around the bb as it goes up those roots.  Great job!


This riders weight looks to be too far back mainly because of how upright he is. Notice the front tire sweving from side to side? getting the chest down would plant that front end...

This riders weight looks to be too far back mainly because of how upright he is (this trail is steep, photo doesn’t really show it). Notice the front tire swerving from side to side? Getting the chest down would plant that front end…


Also, on a climb this steep, I will accelerate the bike (as much as possible) in order to have as much momentum as possible to help me get up the steepest part of the climb, or over obstacles such as the curb-type rock-ledge that my front tire is touching in the first photo (white Yeti Bike). This means that an even lower position of the upper body is needed during the acceleration in order to maintain fore and aft balance.

Your weight shift (fore and aft on the saddle), and lowering your upper body are both mandatory in ascending steep, nasty climbs – to do one or the other is simply not enough. Often, you do need to keep a fair amount of weight on the rear tire to maintain traction (weight over the BB will accomplish this) over slippery rocks, water bars, etc, so you can’t slide as far forward on the saddle as you would like to; you must compensate for this by lowering your chest even more in order to stay balanced on the bike (not “falling” off of the back of the saddle). Also, if you can exaggerate your movement forward on the saddle, you won’t have to drop your chest quite as low. If its super-duper steep, however, I’m probably all the way forward on the saddle—or out of it—and as low as possible with my upper body.

I also need to get out of the saddle for another reason. I need to get my weight off the seat so that the rear tire can “float” up obstacles. I want to get my butt off of the seat BEFORE the rear tire comes in contact with the obstacle and this will effectively “un-weight” the rear wheel. Take note of my upper body position in the first photo; my butt will only leave the seat a couple inches (the bike pivots around the BB and the seat actually drops away, then pivots back as mentioned above), and I will maintain this upper body position, and then return to the saddle (the bike pivots back when the trail flattens out a little). It’s still mandatory to maintain this upper body position, even if I do come out of the saddle briefly.

Since I’ve mentioned pulling or “hanging” on the handlebars, I feel that it’s necessary to debunk a popular myth about climbing on mountain bikes. Perhaps we’ve heard that we should “pull” on the handlebars with each pedal stoke? This advice comes from way back in the day and from road cyclists. While this technique may provide some additional leverage and miniscule amounts of additional power on the road (which is paved with excellent traction, unlike steep nasty MTB trails). It’s a kiss of death to a mountain biker. Road riders don’t have the problem of doing accidental wheelies on climbs because of the construction of the road bike and because the climbs simply aren’t very steep compared to MTB trails. The only times I “pull” on the bars on a MTB while ascending is to make a weight shift forward with my body. And in this case, I’m pulling my body forward, establishing a balanced position, and then I refrain from pulling until I make another adjustment; or, perhaps, make an extreme adjustment in search of traction. I don’t continuously pull on the handlebars with each pedal stoke for reasons explained above.

Perhaps we’ve also heard that we want to climb with our elbows in. Look at the photo. My elbows are fairly elevated. While I AM powering the bike with my lower body, the difficulty of the terrain necessitates frequent weight shifts and adjustments in order to keep the bike moving (the handlebars are used to manipulate the bicycle into a position so that it can be powered and controlled primarily with the lower body). Most of these adjustments require a substantial amount of effort. Your elbows will need to be up and out and, in an athletic and powerful position, in order to be effective with these movements.

Its safe to say that climbing steep and technical terrain requires far more dynamic technique and movement then climbing paved climbs with perfect traction (that’s not to say that one is more difficult – or painful – than the other!). Therefore, a lot of that old advice that may work on the road, or extremely smooth trails, isn’t applicable to riding a MTB in the nasty stuff. Apples and oranges …

Try this out for yourself: find a steep trail with consistent grade and get into the proper ascending position described above. Apply the power. That should feel pretty good, now, suddenly, do everything wrong: scoot back on your saddle and sit bolt up-right! You’ll notice that your power – and therefore your speed and momentum – will drastically decrease.

Mountain Bike Instruction Video: Lifting the Rear Wheel In Switchbacks

CLICK HERE FOR VIDEO: Switchbacks: Rear Wheel Lift (Nosepick)

Here’s Switchback Tip #3. While my first two videos on descending switchbacks are directed at riders of all ability levels, this one is intended for more advanced riders.  Click the link to check it out!  Also, check out the previous videos posted on this website.  If you like what you see, please share with your friends!

Of course, these videos are by no means intended to substitute or equate to real-time, face-to-face mountain bike instruction that involves critiques, demonstrations, feedback, etc. (there’s no substitute for the real thing!).