Virus Update: Is it OK to ride your Mountain Bike?
Should YOU still ride your MTB during this Virus Crisis?
It’s Springtime. The weather is beautiful. You’ve been itching to ride all winter long and now’s the time!!!…. Except that we have this damn Coronavirus mess going on!
Also, we’ve all been hearing all kinds of advice, warnings, threats, dismissals, about the dangers and responsibilities that we’ll assume if we do get out there and ride. So, what should we do? Ride? Don’t ride? Ride and don’t tell anyone about it?
As a person who makes their living in the outdoors, on a bike, former licensed EMT, First Responder, dabbled in the healthcare system… here’s where I’m at on this.
And keep in mind, I’m in no way telling you what to do. Everyone needs to make their own decisions. I think the best thing we all can do is do what we really feel is right the right thing to do. Sure, there are some disagreements on this topic. And that’s fine, even productive — if people can have a good conversation about it. Also, let’s face it, no matter what is advised, stated, threatened, quasi-enforced, some people are still going to ride their bikes. So, hopefully, the following can shed a little light on whether it’s cool to get out on the bike or not and what may be some metrics for a good decision.
Is the Doctor In?
(First, let’s assume that we’re all practicing ‘social distancing’, washing our filthy hands, common sense, etc.)
Maybe this should go without saying, but a huge factor in this decision should probably be the state of the healthcare system in your area. Clearly, if you’re in one of the virus “Hot Spots” where ALL healthcare staff, facilities, equipment, is already extremely stressed and/or overwhelmed, it’s not very responsible to go out on your bike, topple over, break your wrist, and what would normally be a couple more-annoying-than-anything-else next few hours getting patched up at the local urgent care could now very well could become a serious and potentially dangerous situation. You’ll be sucking valuable time and energy from already super stressed healthcare workers. You’re guaranteed that everyone you interact with will be sporting a mask, gloves, etc., all valuable and scarce resources that they just had to use on your sorry ass. You’re subjecting yourself to getting sick. Not cool.
But what if you live in an area that isn’t yet super hard hit by The Virus? Is it then OK for you to get out there and pin it? Well, again, if you screw up and need medical care, the healthcare staff that attends to you WILL be donning said safety equipment and using it up on you. Maybe it’s not in super short supply in your area right now, but will it be in two weeks? Two months?
Most MTB crashes that actually do require medical care are relatively not too bad: Stitches. A half-cast. A few pairs of plastic gloves and a couple face masks down the tubes. But if this happens in Virus-times? You’ll feel like a jerk and you should! What are you gonna tell your friends? (Answer: nothing! You don’t have to; you’re self quarantine-lock-downing! Hide that cast under your pj’s in your work from home conference call).
Seriously, though, what if your crash is a bit worse? At the risk of tarnishing my rep as a professional MTB coach, I’d be lying if I said that I don’t have a few (more than a few) pieces of metal holding the ol’ body together. That level of getting patched up doesn’t happen on the same day. Now how many resources are you eating up? And if this ‘routine surgery’ gets pushed out a little further…. and then a little further… Well, two-three-four weeks from now how stressed will the healthcare system be in your area? If it’s bad (which, who knows?), now you’re going to feel like a MEGA jerk (which you should) and now there’s way higher chance that you’re going bring a case of the ‘Rona home to the kiddies.
So… What? No Riding?
Ok, I’m still riding a bit. Not as much as I’d like to and definitely not as hard as I want to, but I’m still getting on the bike. I also know that, currently, the medical facilities that I would need – barring a very, very unlikely catastrophic injury – resulting from a MTB crash (ER, urgent care facility) are not overwhelmed and/or super stressed in my area. How do I know this? I have multiple friends that work in the healthcare industry said facilities and I’m getting updates on a regular basis.
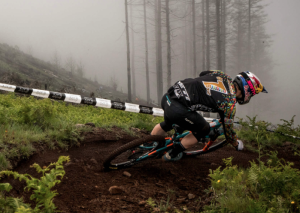
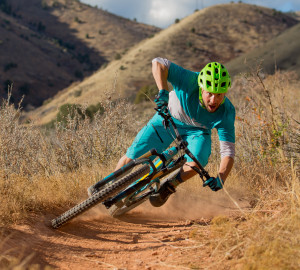
Let’s take this riding thing a bit further: I am riding, but I’m not pushing it. I’m staying well within my limits. Normally my preferred flavor of getting after it is very DH and Enduro oriented. The gnarlier the trails the better. Though I’d like to think I pretty much know what I’m doing, I do like to get out of my comfort zone and push it a bit. And, if you’re going to ride hard, right at or sometimes a bit over your limits, you need to understand that no matter your skill level, you’re gonna hit the deck every now and again. This is a risk I would normally accept. But not now, Virus-times.
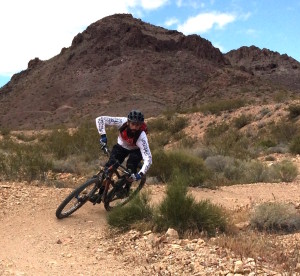
Current riding agenda: chilling and staying well within my limits; longer, technically easier XC rides; more cruising the bike paths around town; working on skill stuff that poses very little level of risk (my parking lot show-off skills are getting dialed!).
Fast people: IMHO, now’s not the time to be ripping shuttle laps with your buddies at the local super sketchy pirate DH trails. Now is not the time to send that big hucker gap that’s been on your mind all winter. But mellow stuff? Takin’ ‘er easy? I’m gonna say probably OK. (As long as your local healthcare system isn’t stressed)
Beginners, novice, intermediate riders: unfortunately, now may not be the best time to learn mountain biking unless in a super safe and controlled setting (i.e.: with a professional riding coach. Wink, wink). Now is not the time to be guessing out there on the trails. The trial and error technique is not wise in the Time of the Virus. If you’re the type of rider that seems to fall down every ride, every other ride… maybe stay off the bike for a bit until this Virus-Crisis blows over. Very often beginner, novice, intermediate riders end up crashing and don’t know why it happened. Now is not the time to go replicate it in order to try and figure it out. Worse, often riders will have success on a trail feature and have no idea why they made it and didn’t die. This gives them a false sense of confidence and there’s a very good chance this roll-of-the dice technique will catch up sooner than later. Now’s not a good time for that.
So – for most riders — I do feel that it’s OK to get out on the bike if you’re willing to adjust your riding style and goals and big-time error on the side of caution (and, as long as the healthcare system in your area isn’t stressed/overwhelmed).
All of his really comes down to making good decisions out there and good decisions are based on knowledge. How do you get that riding-knowledge? How do you raise that riding IQ? How do you know what the What’s and the Why’s are to base your decisions on? DirtSmart MTB Skills Camps of course!!!
OK, yes, I am currently suspending all group camps. I will be adjusting the schedule according to all new information concerning The Virus, recommended travel, etc. You can definitely feel free to contact me for any info concerning this.
I am currently still doing private coaching sessions in the Denver area. Now may be a great time for this depending on your circumstances. Hit me up!
Also, I have a ton of skills videos and articles in the works that I will soon start posting at https://www.dirtsmartmtb.com/dirtsmart-videosarticlesblog/ including a bunch of stuff that you can do on your bike at home, at the neighborhood park, etc., that are extremely low risk and WILL help your riding tremendously. You can actually learn a ton and really develop your skills in your own driveway and/or neighborhood. Just like any sport, good technique in MTB is a result of knowledge, intentional practice, and repetition. As I always tell my students in camps, “If your neighbors don’t think you’re weird, you’re not trying hard enough!” (However, this may not even apply in the Time of The Virus; I think we all may be getting a bit weird at this point. So who are your neighbors to judge!)
**** Again, this is where I currently stand on this topic. This can and probably will change as new information concerning the situation is made available. I do understand that people will disagree with me on both sides of my opinion. I definitely welcome all comments and discourse as long as it’s courteous and adult-like.

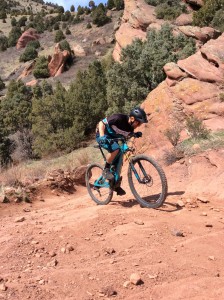
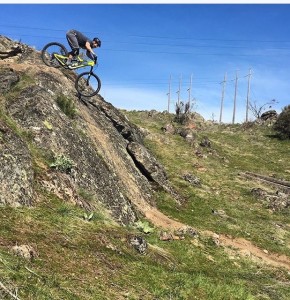
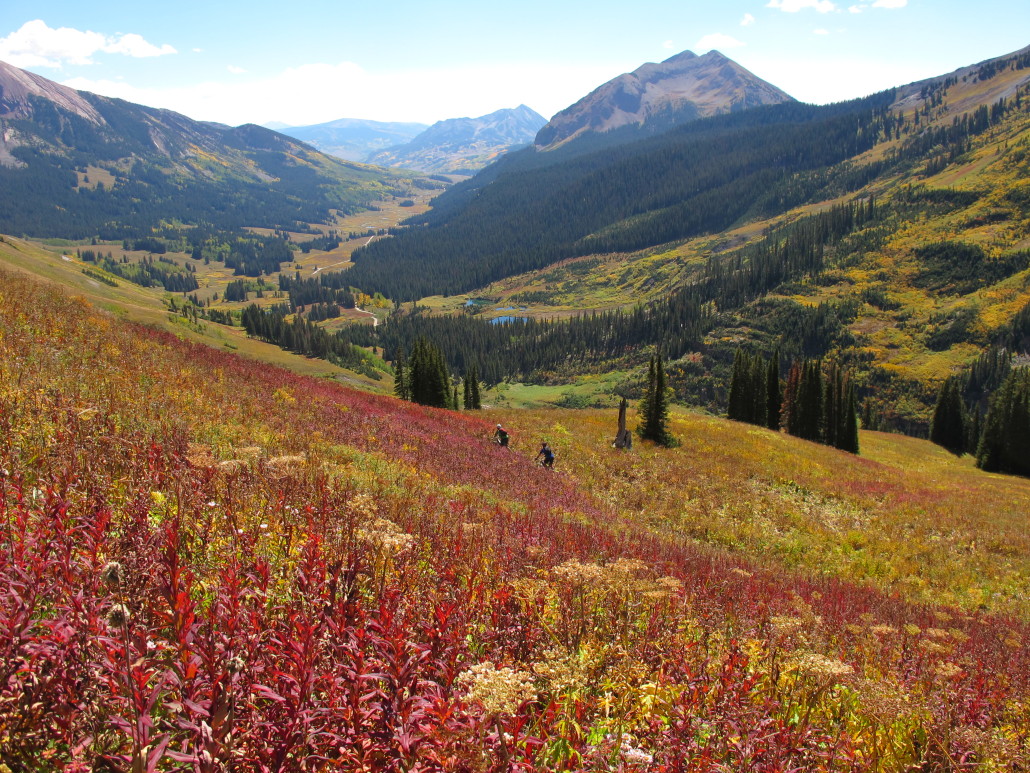 It doesn’t get a whole lot better than this!
 Getting “out there” is fun. But getting hurt, lost, caught off guard by the weather . . . can make things very not-fun really quick. Be prepared, be smart, don’t die!
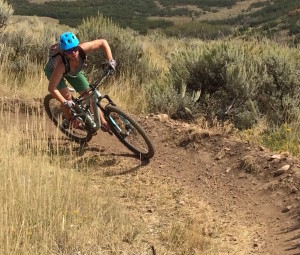


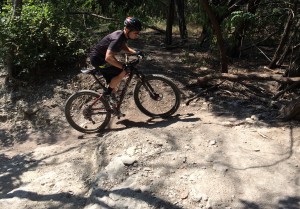
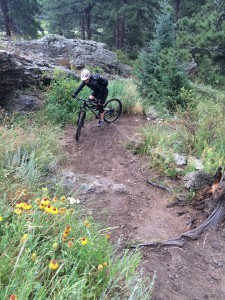
 By lowering her chest, this rider is effectively getting her weight much more over the bottom bracket area of the bike, which is crucial for control on steep climbs.